Monday, September 10, 2012

Getting Creative To Save The Homeowner Money
This 1960’s constructed shower pan failed
(as many do) causing a lot of perimeter water damage. In particular it damaged the exterior wall sheathing. Commonly used in that era was exterior gypsum (think drywall); when that stuff gets wet it crumbles.
Fortunately for the Homeowner only the lower portion got wet. So in this particular case, it wasn't very practical to remove & reinstall a full masonry brick exterior wall just to replace fewer than 20 square feet of sheathing. So we had to get creative.
We installed treated 1x2 blocking and wedged the new treated sheathing behind it. The new sheathing has a small finger sized hole we drilled into it. This gave us a way to hold the sheathing in place so it could be attached to the 1x2 blocking. We had to work in small sections, but this approach was very effective and it saved the Homeowner a lot of money.
Also of interest, the exterior brick wall was tied to the existing wall framing so we couldn't remove it or risk damaging the brick. So the newly installed treated wall studs were attached to the old ones so as to transfer the load of the brick ties over onto the new wall framing.


Fortunately for the Homeowner only the lower portion got wet. So in this particular case, it wasn't very practical to remove & reinstall a full masonry brick exterior wall just to replace fewer than 20 square feet of sheathing. So we had to get creative.
We installed treated 1x2 blocking and wedged the new treated sheathing behind it. The new sheathing has a small finger sized hole we drilled into it. This gave us a way to hold the sheathing in place so it could be attached to the 1x2 blocking. We had to work in small sections, but this approach was very effective and it saved the Homeowner a lot of money.
Also of interest, the exterior brick wall was tied to the existing wall framing so we couldn't remove it or risk damaging the brick. So the newly installed treated wall studs were attached to the old ones so as to transfer the load of the brick ties over onto the new wall framing.

SHOWER SIDE

BEDROOM SIDE
VIDEO
Friday, August 24, 2012
Wall Mounted Vanity Faucets
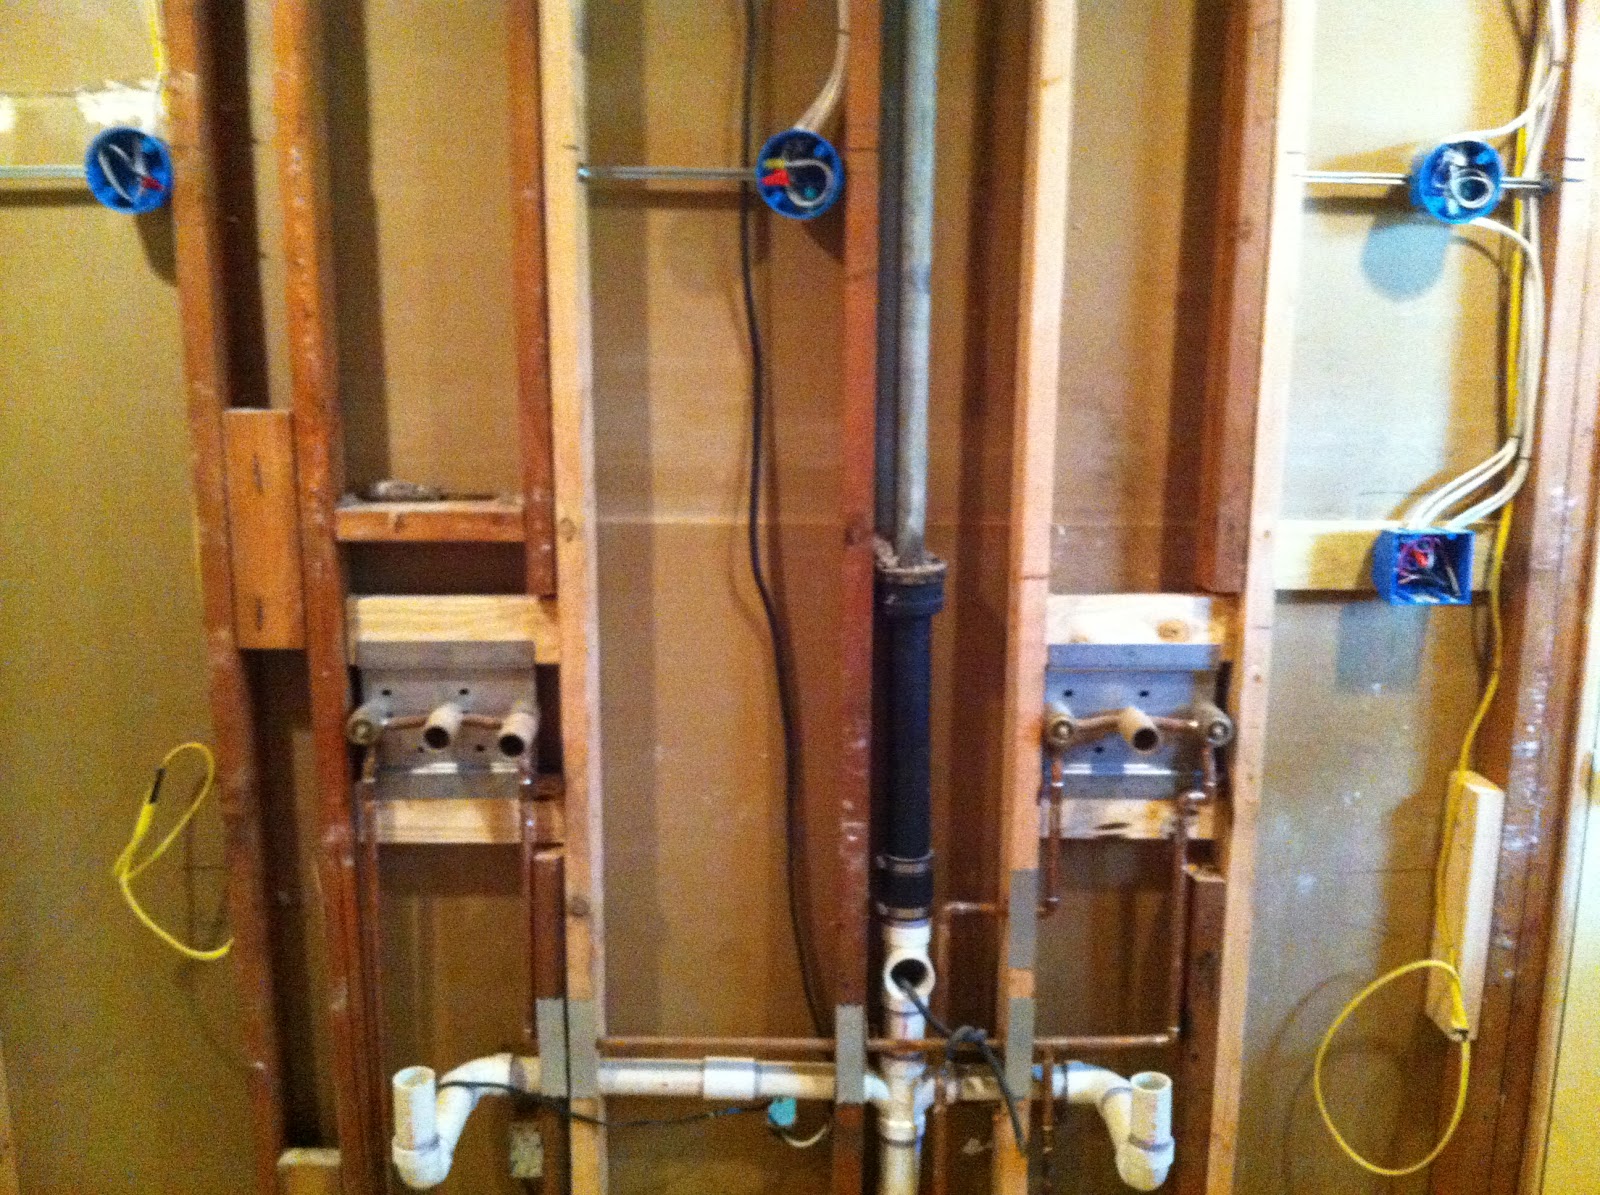
The homeowner of this guest bath has opted for wall mounted vanity faucets. These will be gorgeous, but require a lot of careful planning to layout and install. For starters, you can see the existing wall framing had to be cut out and new framing installed for the valves. The valves also needed cross blocking and must be perfectly level. You can see in the above elevation that these valves have a precise finished destination; so we measured more than twice! Check back soon for what will be great finished photos.



Tuesday, July 17, 2012
Hand Scraping Hardwoods! (Video)
This is a labor intensive process but there's nothing quite like the look of a genuine hand scraped hardwood floor.
Tuesday, June 5, 2012

Tuesday, May 22, 2012
BUY. FILL. GONE.


I've been looking for the right opportunity to try Bagster on a smaller demolition project. This is a 3-yard "bag" that serves as a dumpster. The bag is sold at your neighborhood big box hardware store. Once full, call them and they'll send the truck out to haul it off. It worked great and I'm impressed by the amount of weight it handled. This is a very user friendly service that would also be ideal for the DIY homeowner. Just be sure and verify the service is available in your neighborhood by visiting their website below. www.thebagster.com
Wednesday, May 9, 2012


Subscribe to:
Posts (Atom)